Create a Port call
Create Port call
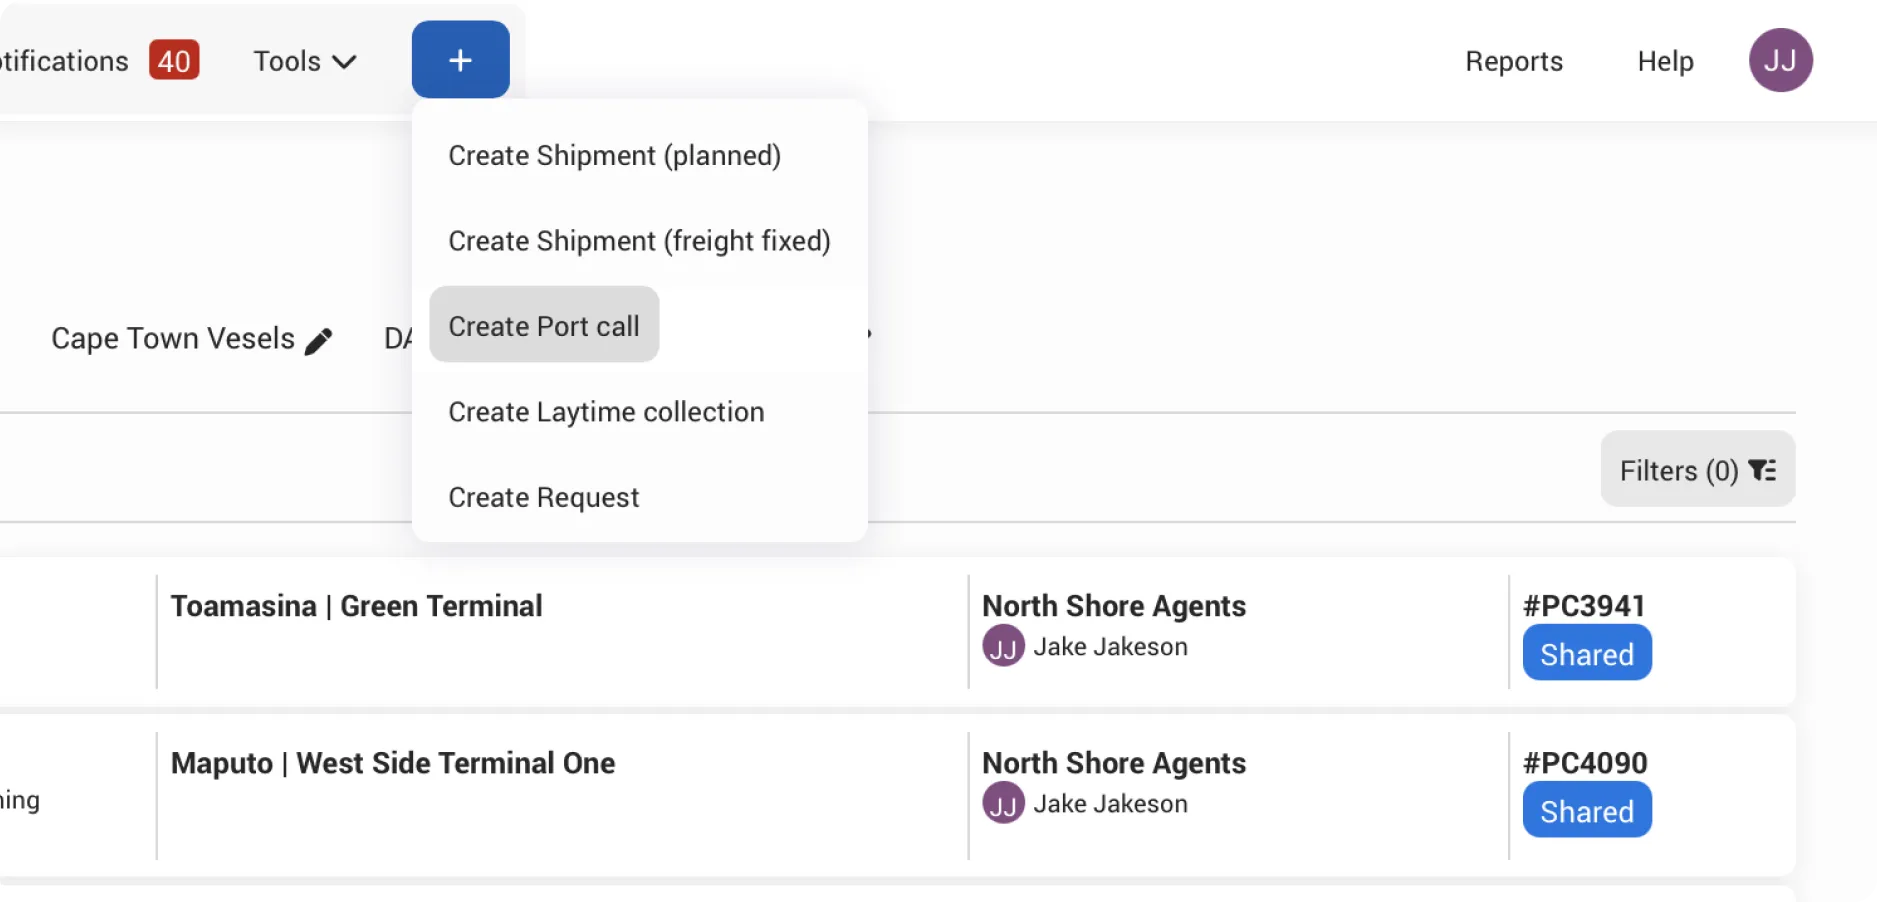
Click on the + button in the top of the navigation bar and then select "Create Port call" from the menu
Enter data
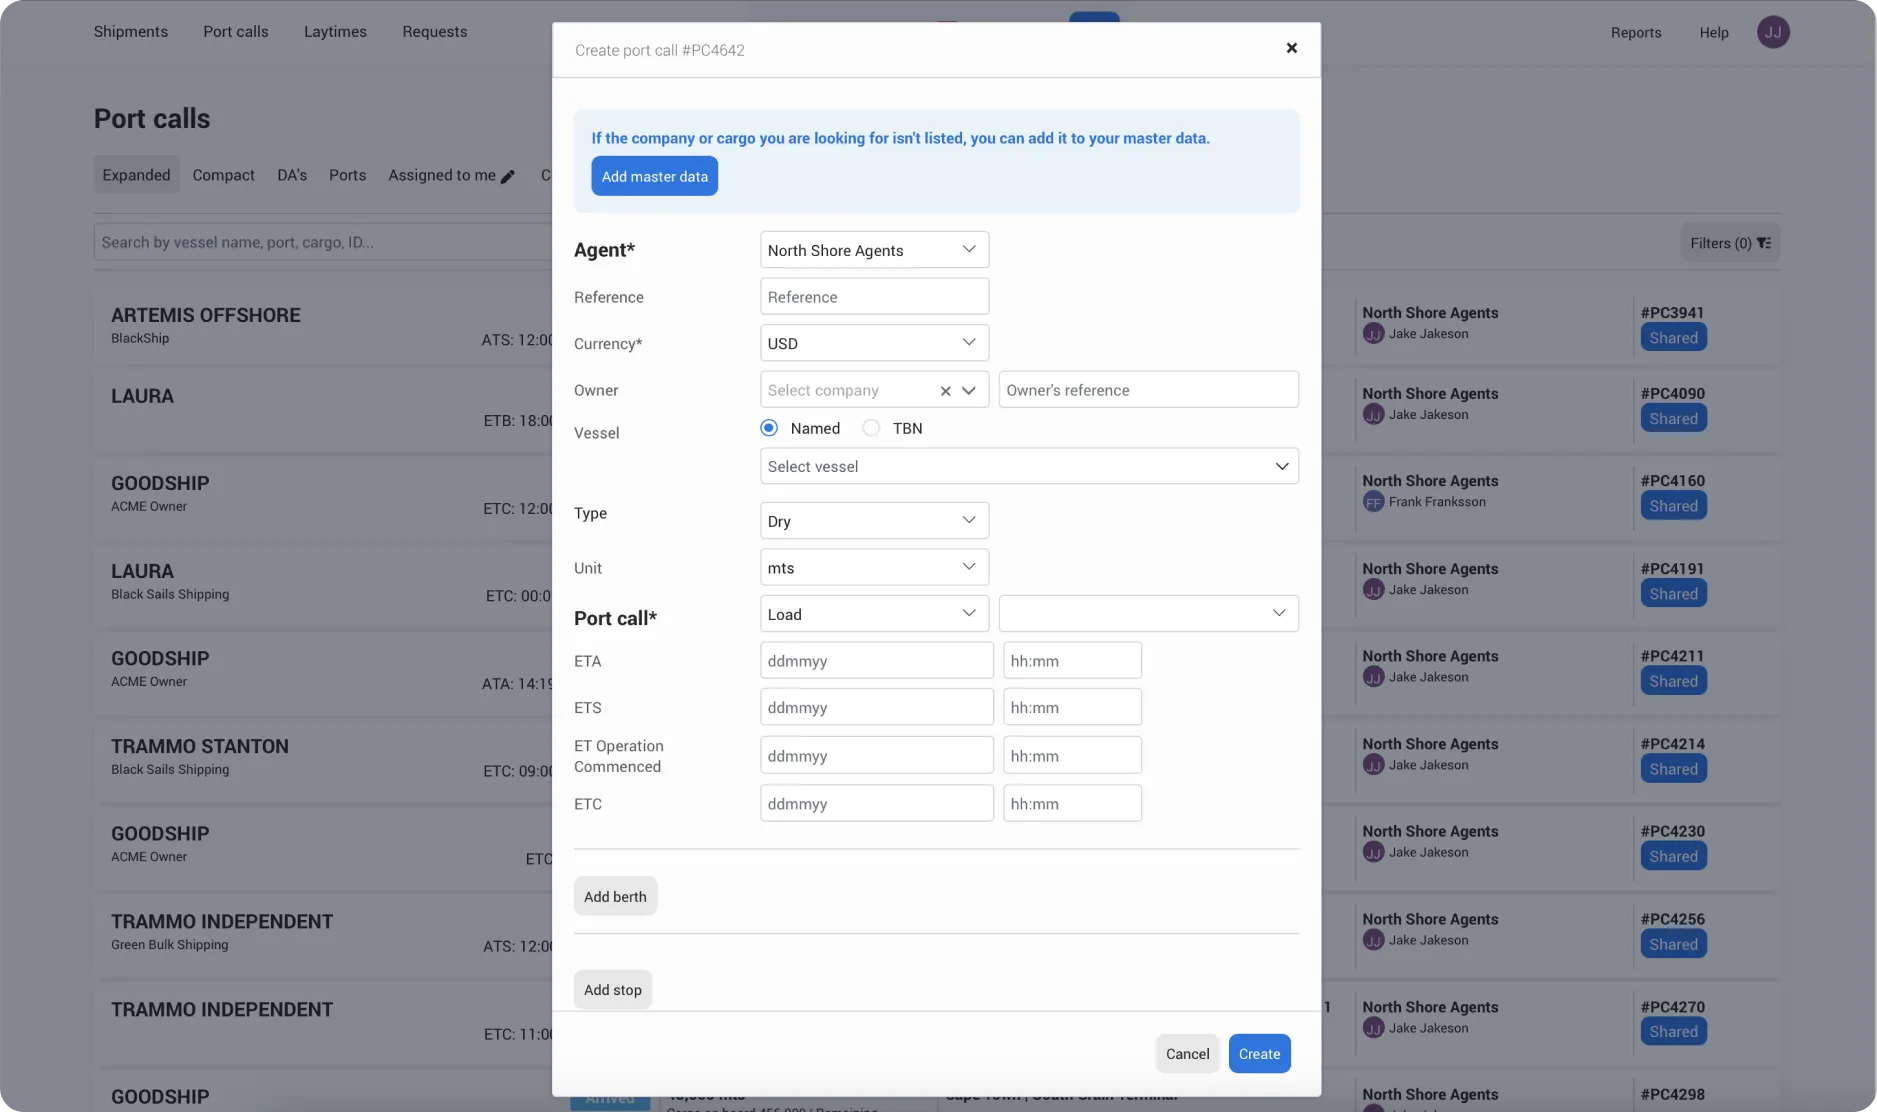
In the following popup, you'll see several fields related to the Port Call. Most fields are optional and can be filled in later if needed. Required fields are marked with an asterisk *.
| |
|---|---|
Agent | Use this field to select the company Legal entity acting as the agent. |
Reference | |
Currency | Set the currency for the Port call. |
Owner | Select the owner's name from your Contacts. If it's not listed, add it to your Master data first. |
Owner reference | |
Vessel | Choose a named vessel or TBN vessel. You can search by vessel name, IMO number, or MMSI number. |
Type | Select whether the cargo is dry, liquid, livestock or RoRo. |
Unit | Choose the cargo unit for this Port call. |
Port call | Select the type of operations this Port Call covers, then choose the port or range name. If it's not available, add it to your Master data. |
ETA | Enter the estimated date and time of arrival. |
ETS | Enter the estimated date and time of sailing. |
ET Operations commenced | Enter the estimated date and time when operations will start. |
ETC | Enter the estimated date and time when operations will be completed. |
Pro tip:
When adding dates for ETA, ETB, or any other date you can type 1609 instead of the full date — just click or tab out, and the system will automatically format it as Sep 16, 2025 using the current year.
For times, it works the same way: type 1900 and it will be formatted as 19:00
Add Berth
To add a berth, click the Add berth button. You can add as many berths as you need.
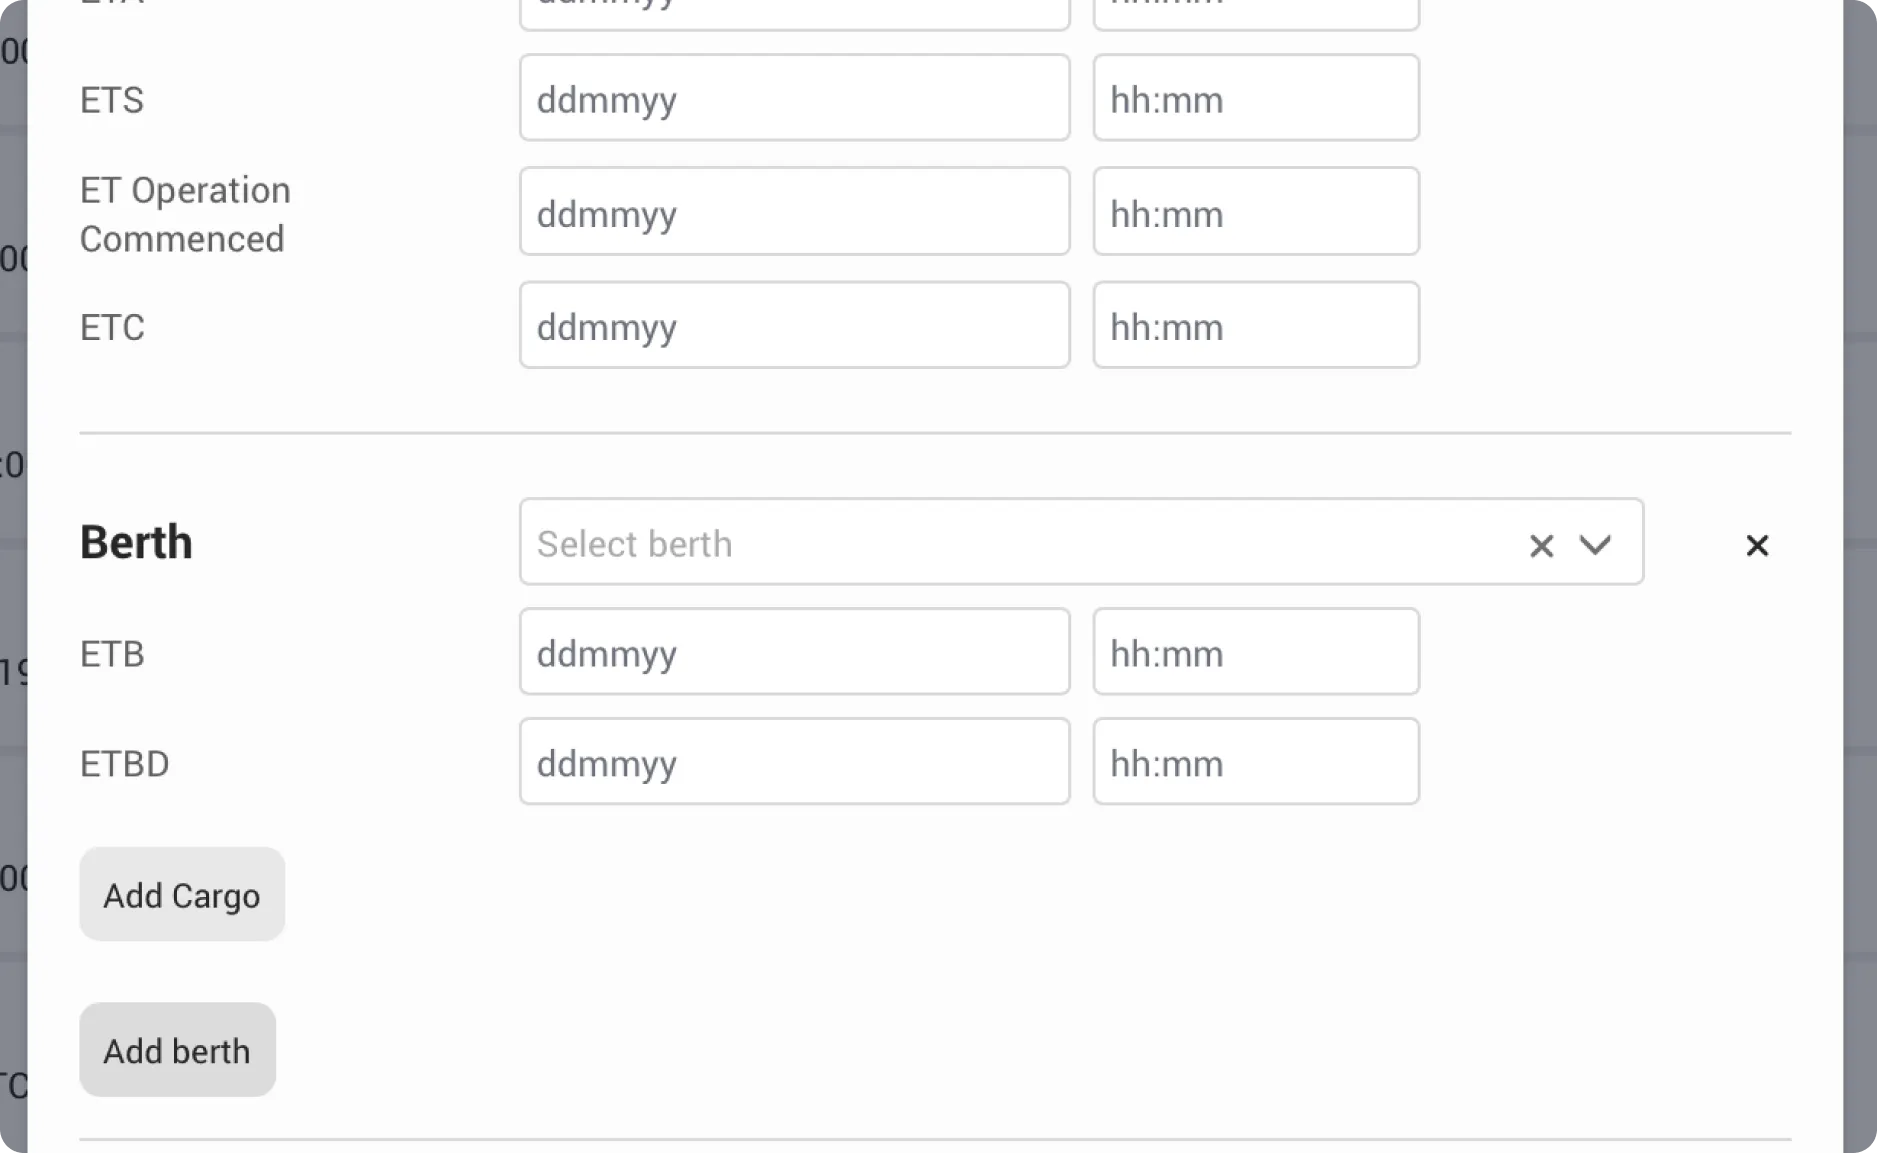
Each berth or terminal includes the following by default:
| |
|---|---|
Berth | Select the berth or terminal name from your list. If it's not available, add it to your Master data. |
ETB | Enter the estimated date and time of vessel berthing. |
ETBD | Enter the estimated date and time of vessel departure from the berth. |
Add Cargo | Click to add cargoes to be loaded or discharged at this berth or terminal. You can add as many cargoes as you need. |
Add Cargo
To add a cargo click Add Cargo button. You can add as many cargoes as you need.
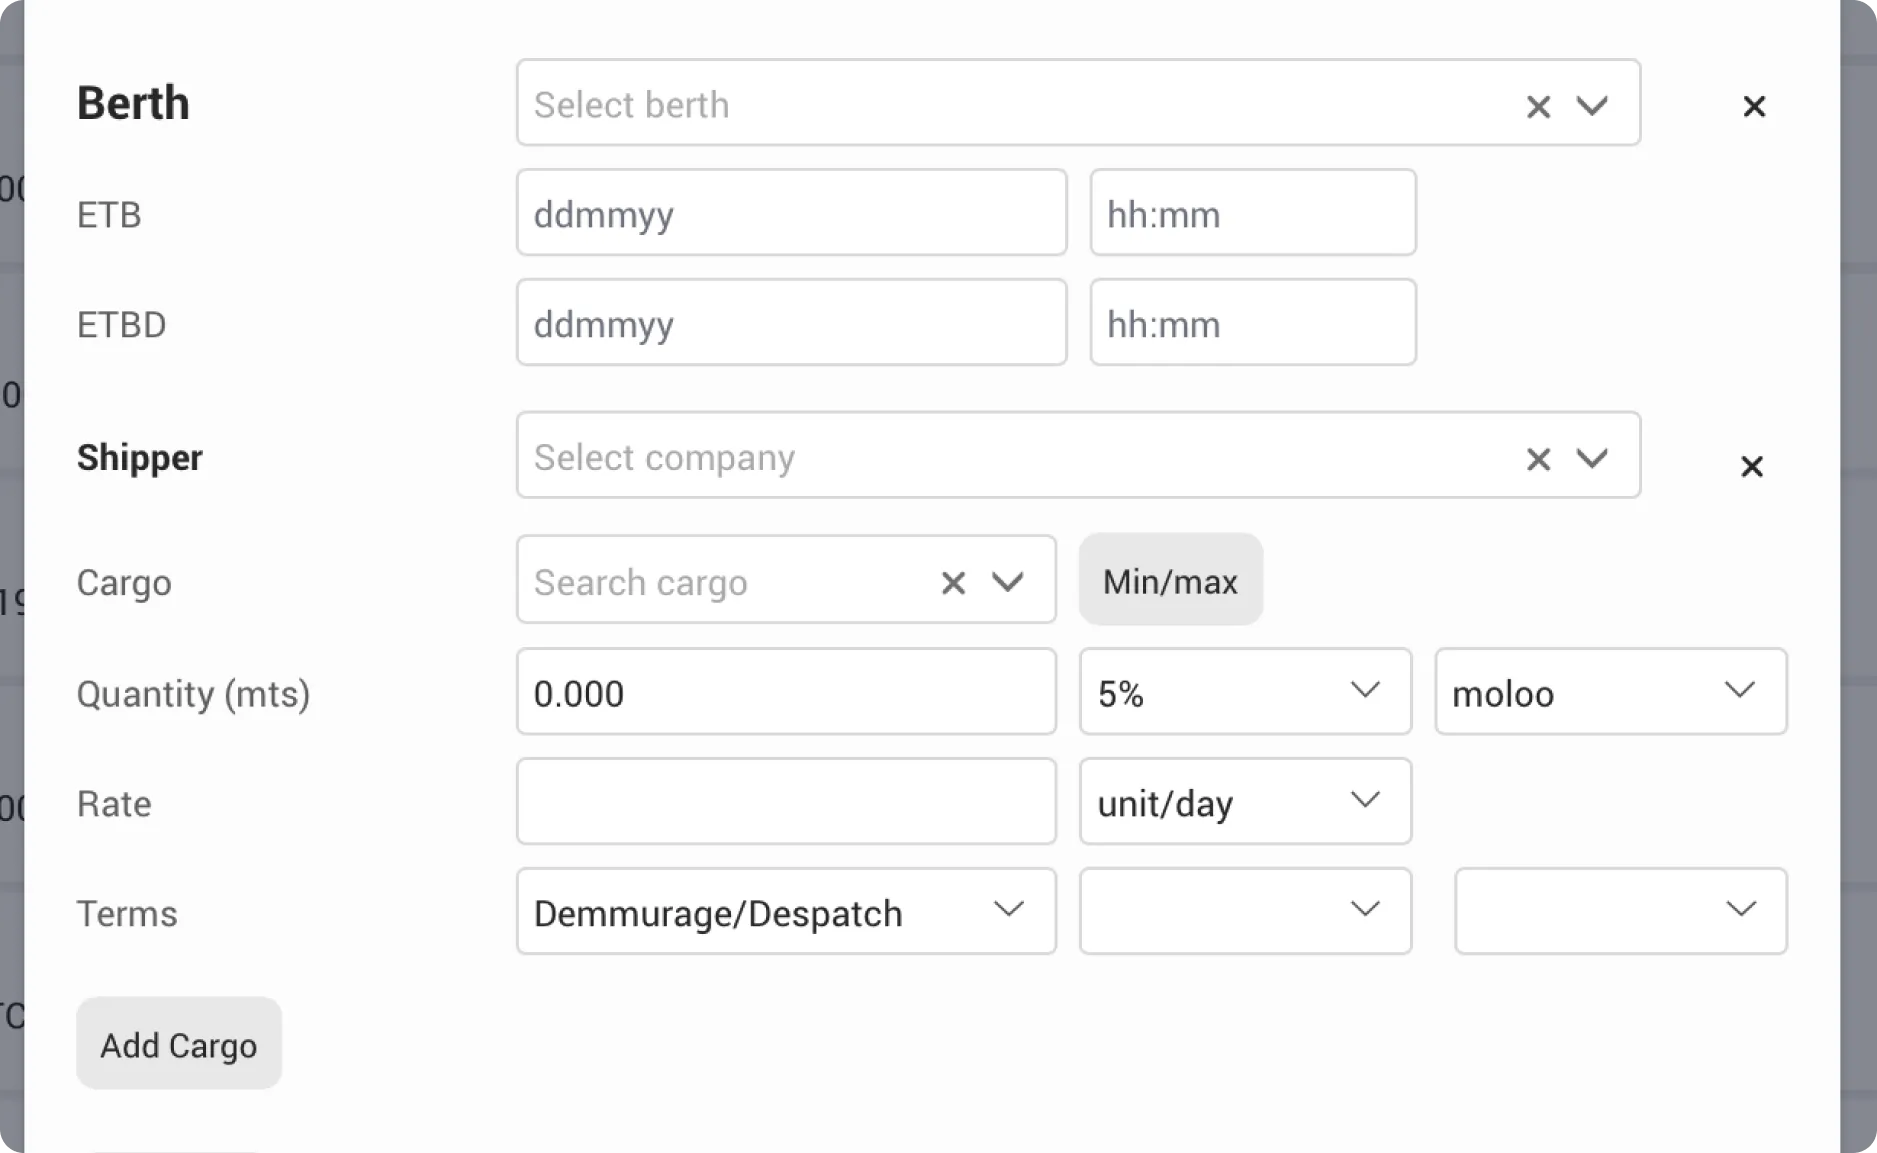
Each cargo section includes the follwing by default:
| |
|---|---|
Shipper/Receiver | Select the Shipper or Receiver name from your Contacts. If it's not listed, add it to your Master data first. |
Cargo | Select the cargo name from your cargo list. If it's not listed add it to your Master data first. |
Quantity | Enter the cargo quantity and tollerance. |
Rate | Enter the loading or discharging rate. |
Terms | Enter the loading or discharging terms. |
Note:
A cargo section can include one Shipper or Receiver and one cargo name. You can add as many cargo sections as you need.
If you have multiple Shippers or Receivers for the same cargo, add a separate cargo section for each Shipper or Receiver.
If you have the same Shipper or Receiver but different cargoes, add a separate cargo section for each cargo name.
Add Stop
Stops are helpful when a vessel has multiple stops or ports within the same appointment — for example, a bunkering stop before arriving at the loading or discharging port. To create a stop, click the Add Stop button. You can add as many stops as you need.
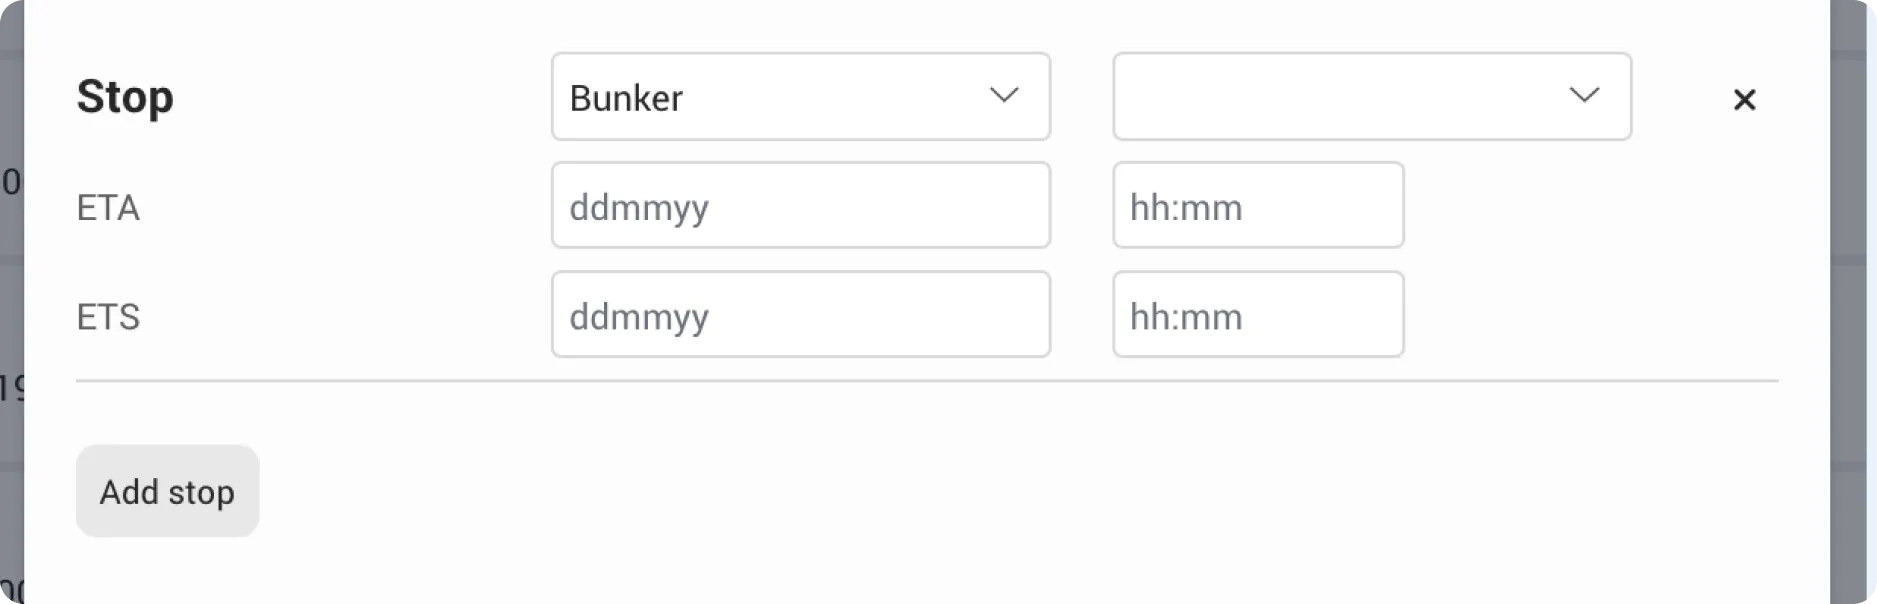
Each Stop includes the following by default:
| |
|---|---|
Stop | Select the stop type, then choose the port or range name. If it's not available, add it to your Master data . |
ETA | Enter the estimated date and time of arrival. |
ETS | Enter the estimated date and time of sailing. |
Add Instructions
Instructions are used to capture extra details that may be helpful while working on this Port Call. All fields are optional.
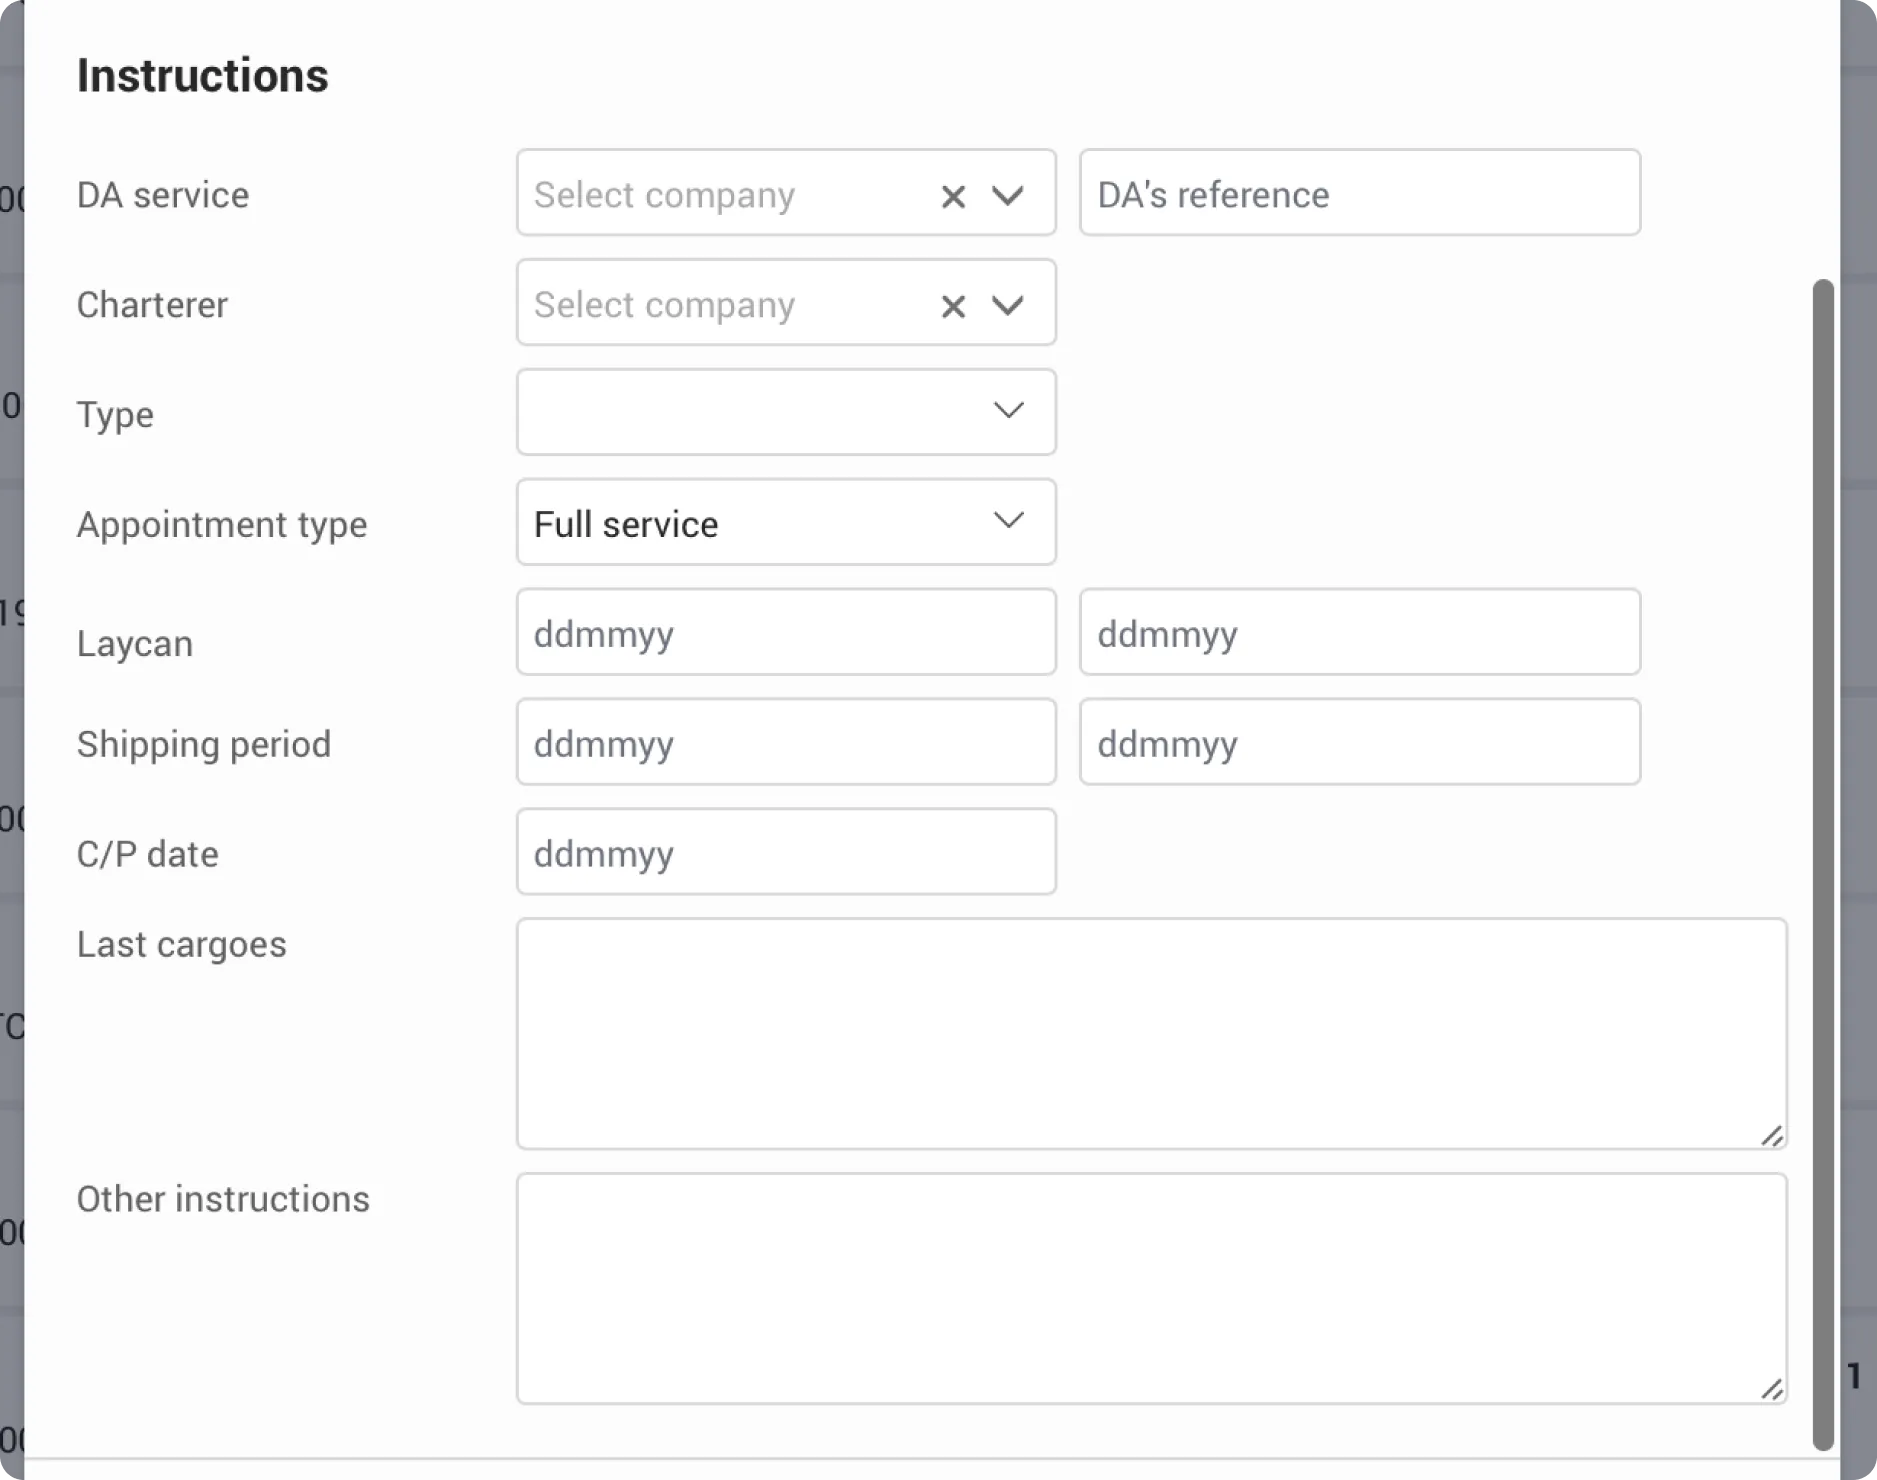
| |
|---|---|
DA Service | Select a company name if you're using a company for the Disbursement Accounts for this Port Call. If the company isn't in the Contact list , add it to your Master data. |
Charterer | Select a company name from your Contacts. If it's not there, add it to your Master data. |
Type | Select the type of the voyage. |
Appointment type | Select the type of services you are providing for this Port Call. |
Laycan | Enter the laycan date range. |
Shipping period | Enter the shipping period date range. |
C/P date | Enter the Charter Party date. |
Last cargoes | Enter details about the vessel's last transported cargoes. |
Other instructions | Enter any additional information you think may be relevant while working on this Port Call. |
Click Create to save all entered information and create the Port Call.
Edit Port call
After creating a port call, you can always edit or add more information at any stage of the port call.
Edit core information
To update core details of the port call, such as the agent legal entity, currency, or vessel name, you can do so by:
Open the port call you want to edit
Click Actionsmenu from top left
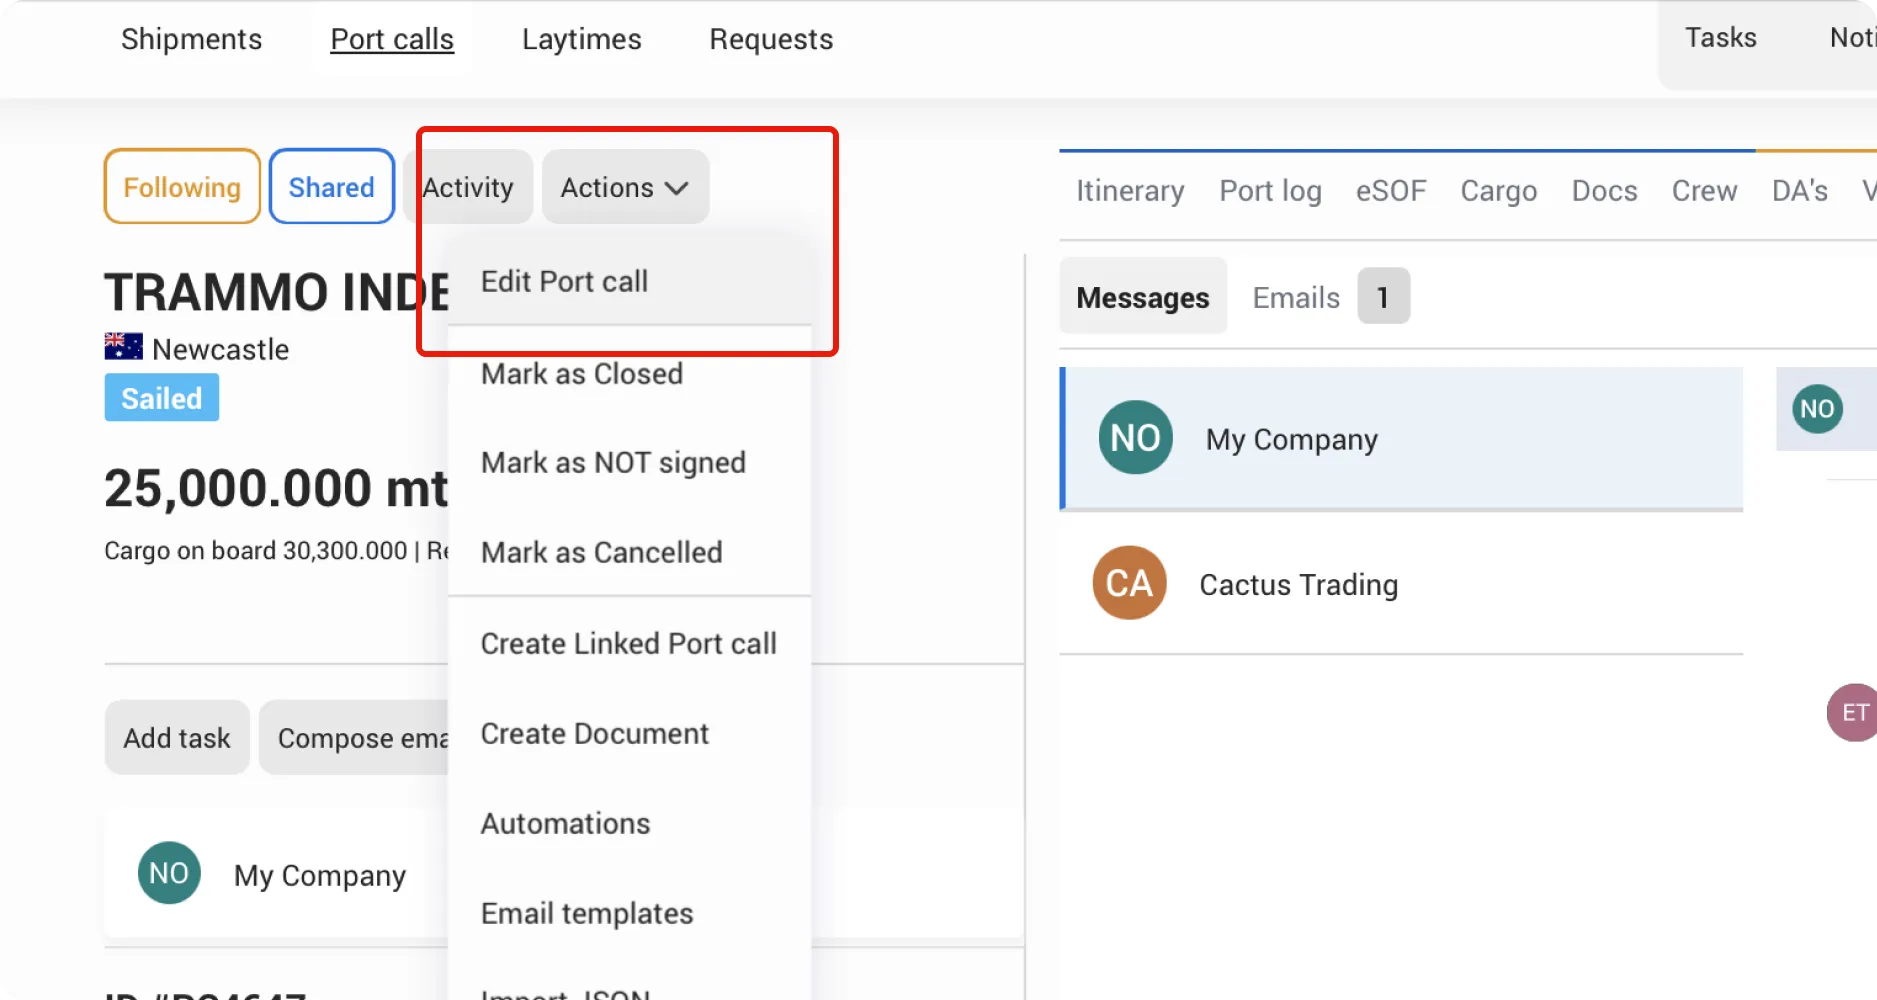
Click Edit Port call button
Update the necessary fields and clickSave
What you can edit:
- Agent legal entity
- Reference
- Port call currency
- Owner
- Vessel
- Type of Port call
- Port call Unit
Edit itinerary
To edit information such as Port name, Berth or Cargo you can do so by:
Open the port call you want to edit
Click Actionsmenu from top left
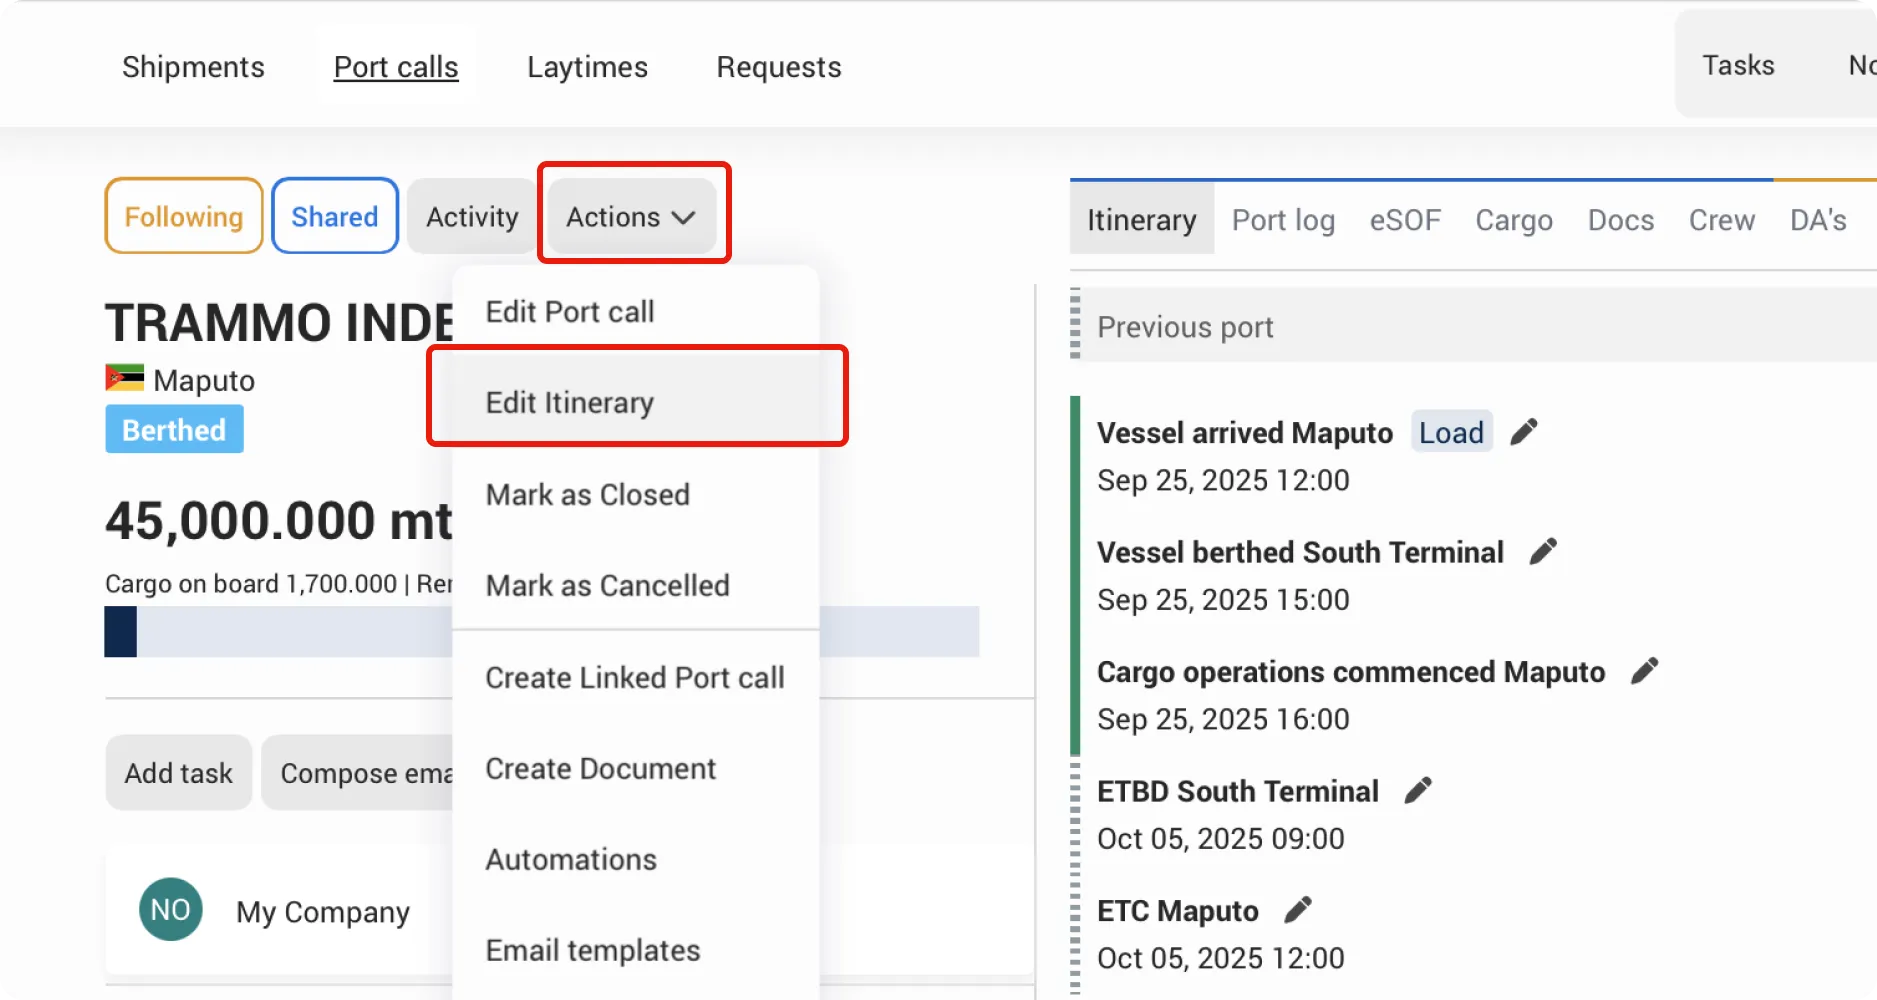
Click Edit Itinerary button
Update the necessary fields and clickSave
What you can edit:
- Port name
- ETA, ETS, ET Operation commenced, ETC
- Berth name
- ETB, ETBD
- Receiver/Shipper name
- Cargo name
- Cargo quantity and operation terms
- Stops